Weizengras zu Hause anbauen: Eine einfache Schritt-für-Schritt-Anleitung
Wenn Sie Ihre Ernährung einfach und gesund bereichern und Ihren Gerichten oder Getränken eine frische Note verleihen möchten, gibt es nichts Besseres als Weizengras-Microgreens. Diese winzigen Sprossen voller Nährstoffe und intensivem Geschmack erfreuen sich bei gesundheitsbewussten Feinschmeckern großer Beliebtheit. In diesem Artikel erklären wir Ihnen die grundlegenden Schritte zum einfachen und effektiven Anbau von Weizengras-Microgreens, damit Sie diese kleinen grünen Wunder in nur wenigen Wochen genießen können.
Lesen Sie mehr über die gesundheitlichen Vorteile von Weizengras in unserem früheren Artikel: Link
Nährstoffreichtum: Weizengras-Microgreens sind reich an essentiellen Vitaminen, Mineralstoffen und Antioxidantien wie Vitamin C, Vitamin E, Kalzium und Eisen, die für die Gesundheit unerlässlich sind. Regelmäßiger Verzehr kann Ihren Körper mit einer Vielzahl wichtiger Nährstoffe versorgen.
Einfacher Anbau: Weizengras-Microgreens lassen sich einfach zu Hause anbauen und benötigen nur wenig Platz und spezielle Ausrüstung. Sie können auf der Fensterbank oder in einem kleinen Behälter angebaut werden und sind somit für jeden zugänglich, auch für diejenigen ohne Garten.
Kulinarische Vielseitigkeit: Weizengras-Microgreens verleihen einer Vielzahl von Gerichten und Getränken einen Hauch von Frische und einen intensiven Geschmack. Sie können zum Garnieren von Salaten, Sandwiches, Hauptgerichten oder sogar in Smoothies und Säften verwendet werden, um deren Nährwert zu steigern.
Nachhaltigkeit: Der Anbau eigener Weizengras-Microgreens kann dazu beitragen, die Umweltbelastung durch Produktion und Transport kommerzieller Lebensmittel zu reduzieren. Darüber hinaus kann es einen nachhaltigeren und umweltbewussteren Lebensstil fördern.
Gesundheitliche Vorteile von Weizengras-Microgreens
Stärkt das Immunsystem : Die hohe Konzentration an Vitaminen und Antioxidantien in Weizengras-Microgreens kann das Immunsystem stärken und den Körper widerstandsfähiger gegen Infektionen und Krankheiten machen.
Unterstützt die Entgiftung : Weizengras enthält Chlorophyll, ein natürliches Entgiftungsmittel, das den Körper von Giftstoffen befreit und die Lebergesundheit unterstützt. Der regelmäßige Verzehr von Weizengras-Microgreens kann die natürlichen Entgiftungsprozesse des Körpers unterstützen.
Verbessert die Verdauung : Weizengras-Microgreens sind reich an Ballaststoffen, die eine gesunde Verdauung fördern und Verstopfung vorbeugen. Ballaststoffe unterstützen außerdem das Wachstum nützlicher Bakterien im Darm und verbessern so die allgemeine Verdauungsgesundheit.
Unterstützt die Gewichtskontrolle : Weizengras-Microgreens sind kalorienarm und nährstoffreich und eignen sich daher hervorragend für eine Diät zur Gewichtsreduktion oder Gewichtskontrolle. Der Ballaststoffgehalt fördert zudem das Sättigungsgefühl und reduziert so die Gesamtkalorienaufnahme.
Fördert gesunde Haut und Haare : Die Antioxidantien in Weizengras-Mikrogrün schützen die Haut vor Schäden durch freie Radikale und sorgen so für gesündere, strahlendere Haut. Darüber hinaus können die Nährstoffe im Weizengras das Haarwachstum fördern und die Haarfollikel stärken.
Wenn Sie bereit sind, sich auf eine aufregende, gesunde und leckere Reise zu begeben, lesen Sie weiter, während wir die Geheimnisse des Anbaus dieser Miniaturwunder lüften.
Weizengras-Microgreens Übersicht
|
Geschmack |
Leicht süß und leicht grasig |
|
Nährwert |
Reich an Vitamin A, C, E und K, Mineralien und Antioxidantien. |
|
Vorweichen |
8-12 Stunden |
|
Spülen/Entleeren |
Nicht erforderlich |
|
Lichtanforderungen |
Bevorzugt indirektes Sonnenlicht oder Wachstumslampen |
|
Keimtemperatur und relative Luftfeuchtigkeit |
Temperaturen: 18 °C bis 24 °C (65 °F bis 75 °F) und relative Luftfeuchtigkeit: 80–90 % |
|
Wachstumstemperatur und relative Luftfeuchtigkeit |
Gedeihen bei Temperaturen zwischen 18 °C und 24 °C (65 °F und 75 °F) |
|
Bewässerungsbedarf |
Sorgen Sie für einen gleichmäßigen Feuchtigkeitsgehalt und vermeiden Sie Überwässerung |
|
Keimzeit |
2 Tage |
|
Optimale Ernte |
Innerhalb von 10 bis 12 Tagen (wächst nach) |
Unverzichtbare Werkzeuge für den Anbau von Weizengras-Microgreens
Benötigte Materialien:
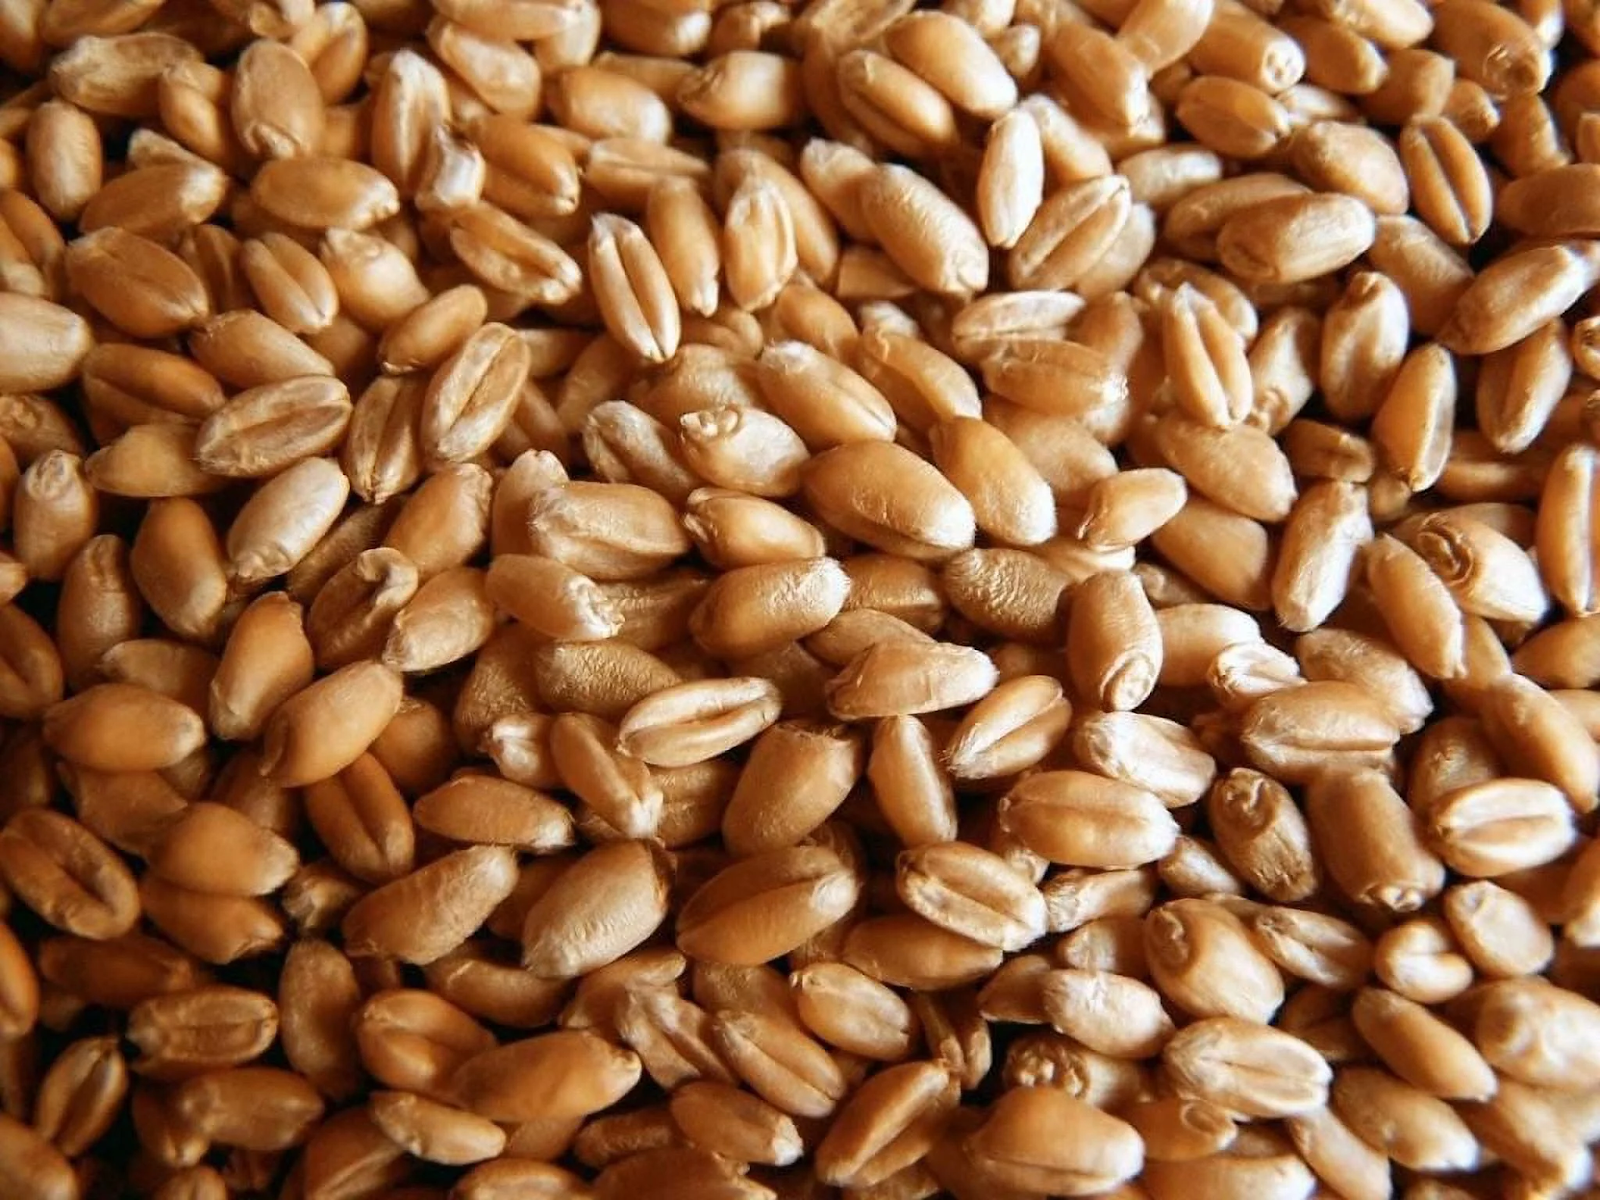
- Saatgut : Hochwertiges Weizengras-Saatgut ist für den erfolgreichen Anbau unerlässlich. Entdecken Sie hier unsere Saatgutauswahl .
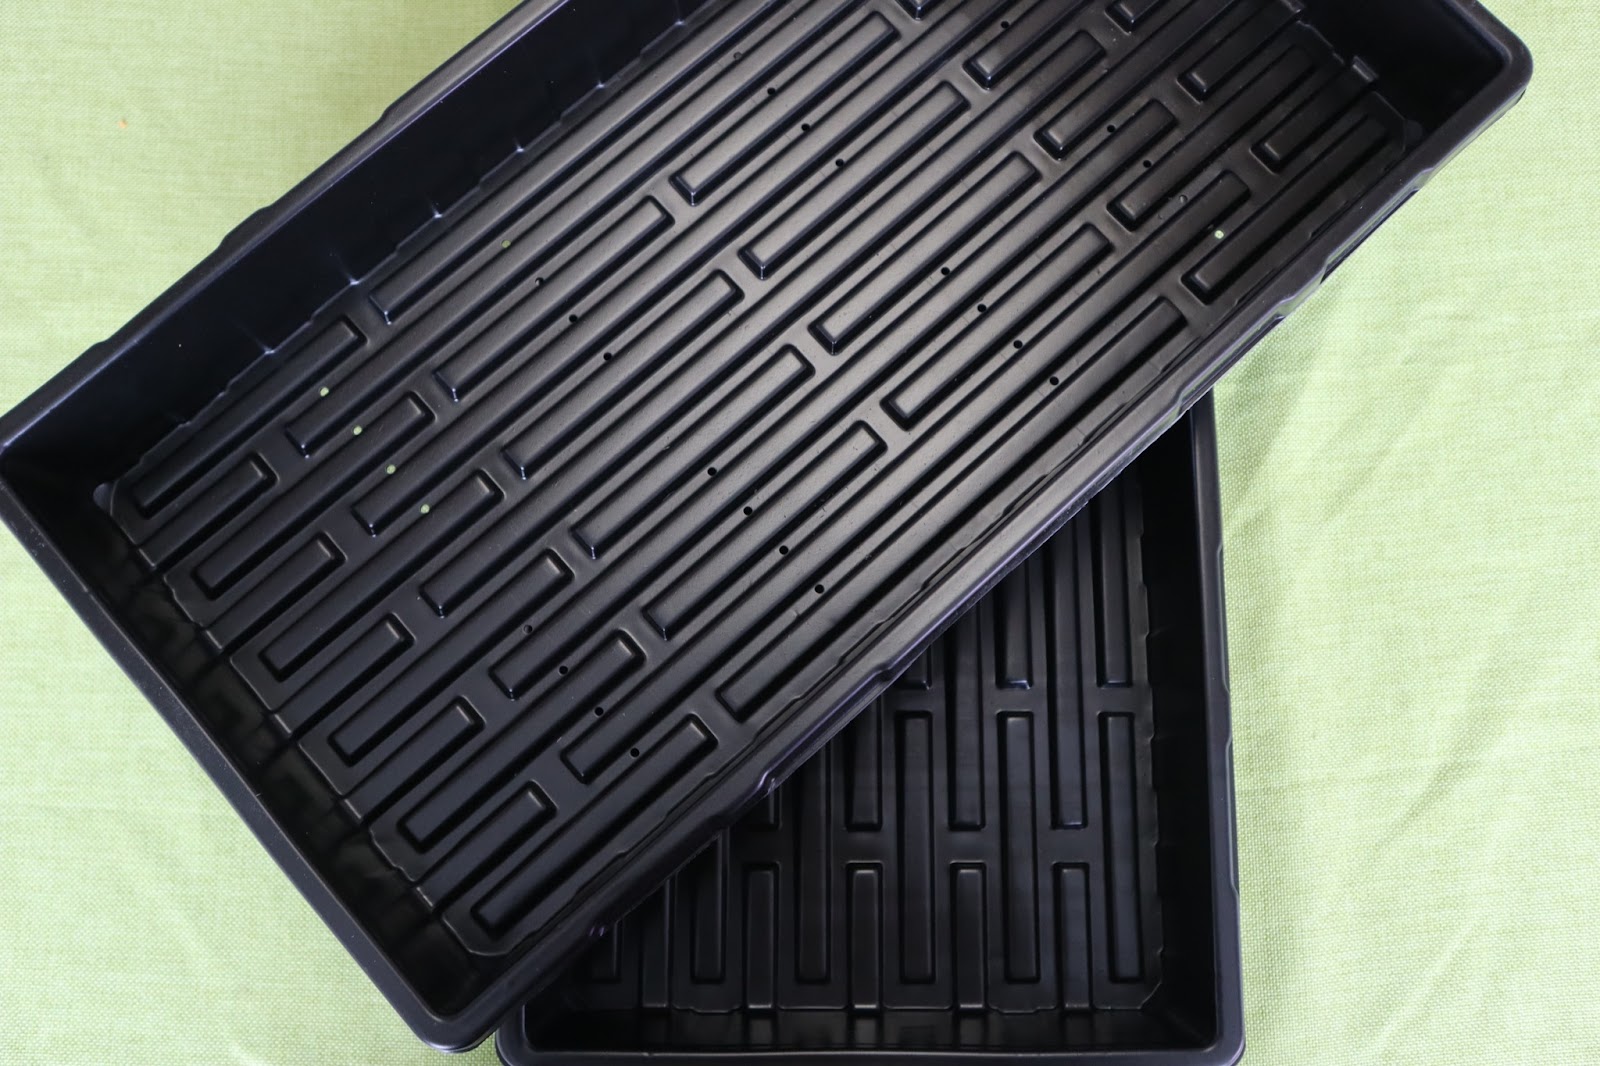
- Schalen/Behälter : Sie benötigen zwei Schalen – eine tiefe Schale mit Abflusslöchern für optimale Wachstumsbedingungen und eine weitere Schale ohne Löcher, die Sie darunter platzieren, um überschüssiges Wasser aufzufangen. Unsere Auswahl finden Sie hier .
- Wachstumsmedium : Wählen Sie ein nährstoffreiches Wachstumsmedium wie eine Saatmischung oder Kokosfaser, um ein gesundes Wachstum zu unterstützen.
- Beleuchtung : Sorgen Sie für optimales Licht für Ihr Microgreen-Wachstum. Natürliches Sonnenlicht ist zwar effektiv, für optimale Ergebnisse empfehlen wir jedoch unsere T5 LED Microgreen Grow Lights . Mit einem 6500K-Spektrum bieten diese Lampen das ideale Lichtspektrum für den Anbau von Microgreens und garantieren so optimales Wachstum und Gesundheit.
- Sprühflasche : Eine Sprühflasche ist notwendig, um während der Keimung und des Wachstums die richtige Feuchtigkeit aufrechtzuerhalten .
Optionale Materialien:
- Feuchtigkeitskuppel : Verwenden Sie eine Feuchtigkeitskuppel, um während der Keimphase eine feuchte Umgebung zu schaffen und so das erfolgreiche Keimen und frühe Wachstum der Samen zu unterstützen. Entdecken Sie unsere Auswahl an Feuchtigkeitskuppeln Hier .
- Rack-Lüfter : Verbessern Sie die Luftzirkulation und regulieren Sie die Temperatur für optimale Wachstumsbedingungen mit unserem Rack-Lüfter . Zusätzlich können Sie die Lüftergeschwindigkeit mit dem Lüfterdrehzahlregler steuern und so eine präzise Anpassung an Ihre spezifischen Bedürfnisse ermöglichen.
- Digitales LCD-Thermometer-Hygrometer: Überwachen Sie Temperatur und Luftfeuchtigkeit im Innenbereich mit unserem digitalen LCD-Thermometer-Hygrometer . Dieses Tool liefert wertvolle Einblicke in die Wachstumsumgebung und stellt optimale Bedingungen für die Entwicklung Ihrer Microgreens sicher.
Schrittweiser Wachstumsprozess
Nachdem wir nun alle notwendigen Materialien und Informationen zum Anbau von Weizengras-Microgreens haben, finden Sie hier die Schritt-für-Schritt-Anleitung zum Anbau:
SCHRITT 1: Bereiten Sie Ihre 1020 Microgreen Deep Trays vor
Nehmen Sie die tiefe Schale mit Löchern und stellen Sie die Schale ohne Löcher darunter, sodass beide aufeinander gestapelt sind. Füllen Sie zunächst die obere Schale mit Löchern mit Erde, bis die Oberfläche eben und eben ist. Sie können die Erde mit einer Presse oder mit der Hand gleichmäßig verteilen und Vertiefungen leicht auffüllen.
SCHRITT 2: Säen Sie Ihre Samen
Verteilen Sie die Weizengrassamen gleichmäßig auf der Oberfläche. Bewässern Sie die Oberfläche mit der Sprühflasche und geben Sie etwas Wasser in die Bodenschale, um die Erde durchgehend feucht zu halten.
SCHRITT 3: Keimung Bühne
Da die Samen von Natur aus bevorzugt unter der Erde keimen, sollten Sie eine weitere Schale über die Samen legen, um die Dunkelheit zu bewahren. Fügen Sie dann ein Gewicht von etwa 5 kg hinzu. Diese Samen sind bemerkenswert widerstandsfähig und können zusammen Gewichte von bis zu 2,3 kg tragen. Beachten Sie, dass das zusätzliche Gewicht zu einem dickeren und stärkeren Stamm- und Wurzelwachstum beiträgt.
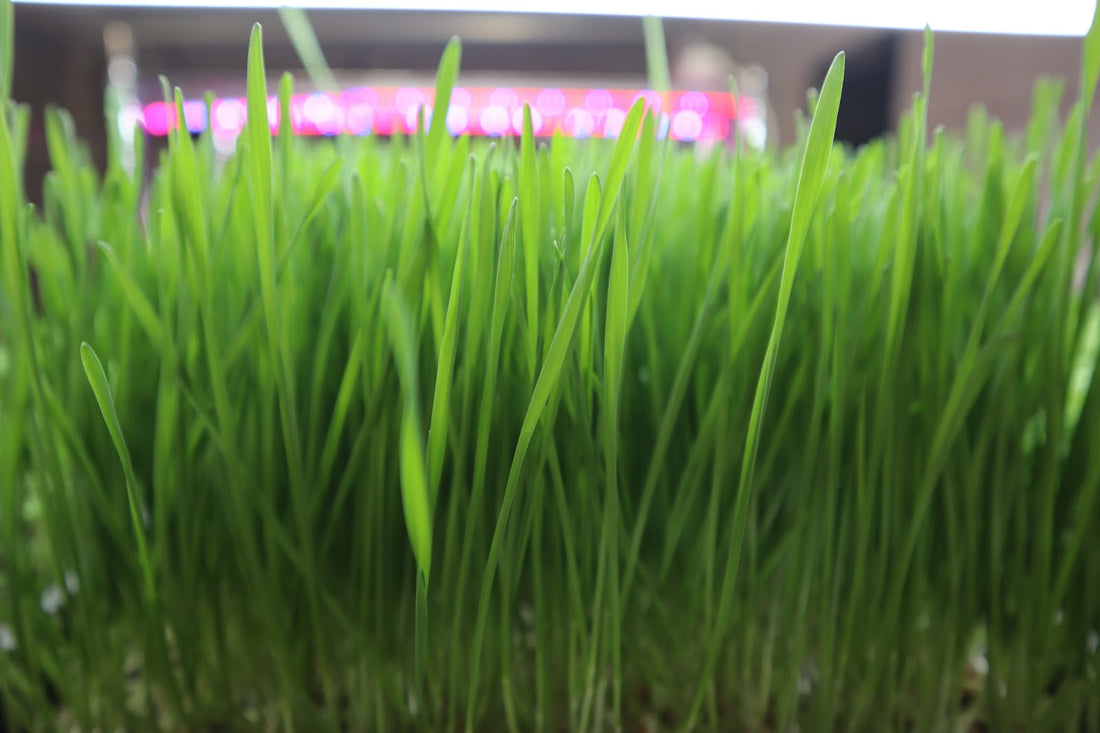
SCHRITT 4: Anbau unter künstlicher intelligenter T5-Beleuchtung
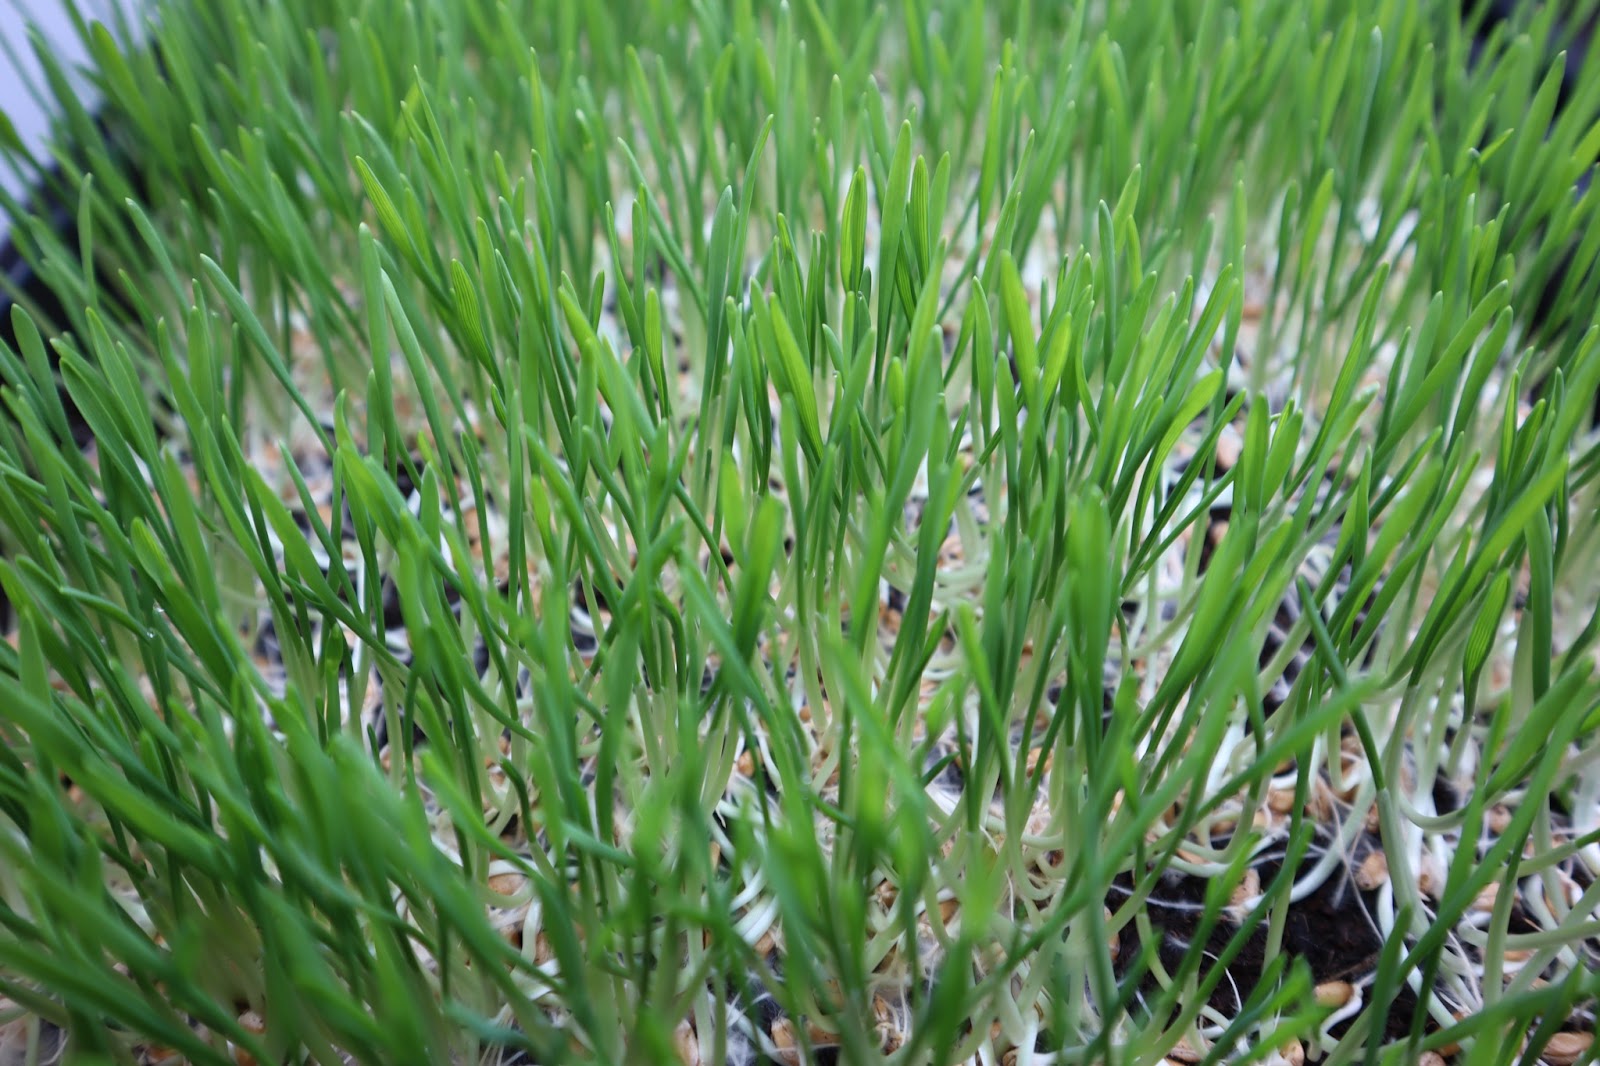
Sobald die Samen gekeimt sind, befinden sie sich in der nächsten Wachstumsphase: dem Sämling. Entfernen Sie die Feuchtigkeitskuppel von der 1020-Schale oder holen Sie Ihre 1020-Schale aus dem dafür vorgesehenen dunklen Bereich und stellen Sie sie unter die Lichtquelle – wir empfehlen T5-LED-Lampen mit 6500 K, die ausreichend Licht (1200–2200 Lumen) liefern. Stellen Sie außerdem sicher, dass Sie eine Zeitschaltuhr verwenden, um die Lichtmenge zu programmieren, die Ihre Pflanzen benötigen. So stellen Sie sicher, dass sie während ihres gesamten Lebenszyklus Photosynthese betreiben und die Nährstoffe liefern, die Ihr Körper benötigt.
Auch der Abstand zur Lichtquelle ist sehr wichtig. Ist die Lichtquelle zu weit von den Sämlingen entfernt, können diese zu dehnbar und dünn werden. Ist das Licht jedoch zu nah, können sie sich nicht vollständig über den Rand des 1020-Tabletts hinausdehnen, was die Ernte erschwert und den Ertrag reduziert. Daher empfehlen wir, das obere Ende des 1020-Tabletts 22–25 cm von den Wachstumslampen entfernt zu platzieren.
Wenn Sie an einem sonnigen Ort wohnen, können Sie Ihr 1020-Tablett natürlich auch auf der Sonnenseite Ihres Hauses platzieren, beispielsweise auf einer Fensterbank oder im Freien.
Die Temperaturen sollten denen in Ihrem Keimraum ähneln, die Luftfeuchtigkeit kann jedoch variieren. Während Ihre Sämlinge wachsen, benötigen sie nicht nur mehr Platz, sondern geben auch kontinuierlich Feuchtigkeit ab, wodurch die relative Luftfeuchtigkeit während des gesamten Wachstumszyklus steigt. Um das Risiko von Schimmel oder ähnlichen Qualitätsproblemen zu verringern, halten Sie die Luftfeuchtigkeit zwischen 45 und 55 % RH. Es gibt relativ günstige, intelligente Luftbefeuchter, die Ihnen helfen, eine ausreichende RH aufrechtzuerhalten. Zusätzlich können Sie einen Ventilator oder eine Lüftung verwenden, um Feuchtigkeitsansammlungen und hohe Luftfeuchtigkeit in Ihrem 1020- Tablett zu reduzieren .
Auch das Gießen ist entscheidend: Wenn Sie bemerken, dass die Erde trocken ist, gießen Sie unbedingt aus der unteren Schale, damit die Erde das Wasser aufnehmen kann. Diese Methode ist wichtig, um die Weizengras-Microgreens trocken zu halten und so Pilzbefall vorzubeugen, der bei dieser Art von Microgreens häufiger auftritt.
SCHRITT 5: Ernte
Ihre Weizengras-Microgreens sollten eine Höhe von etwa 15 Zentimetern erreicht haben und sind dann erntereif. Zum Ernten empfehlen wir, das Gras mit einer scharfen Schere knapp über dem Wurzelansatz oder verbliebenen Samenresten abzuschneiden.
SCHRITT 6: ESSEN SIE IHRE MICROGREENS und Lagerung
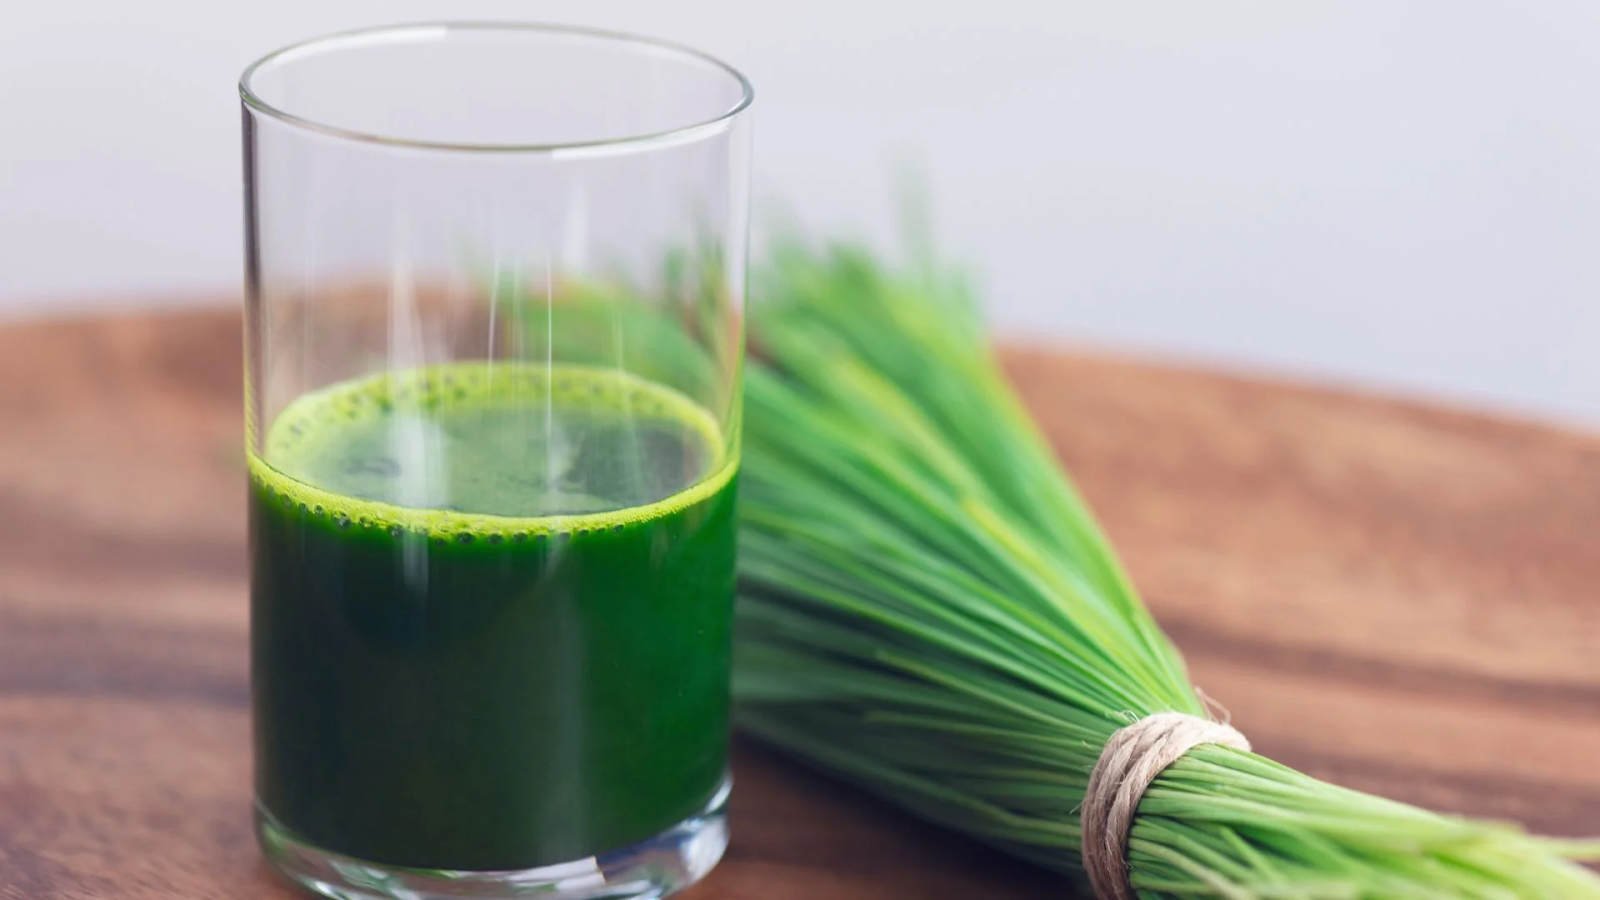
Es ist wichtig zu beachten, dass Weizengras nicht direkt verzehrt werden sollte, da es für den Menschen giftig sein kann. Die reifen Weizenblätter (aus denen Weizengrassaft gewonnen wird) enthalten eine Substanz namens Gliadin, die für manche Menschen schwer verdaulich sein und möglicherweise Nebenwirkungen hervorrufen kann, insbesondere bei Verzehr in großen Mengen.
Weizengrassaft aus jungen Weizengrassprossen gilt jedoch bei richtiger Zubereitung und Einnahme als unbedenklich für den menschlichen Verzehr. Frisch aus zarten Weizengrassprossen gewonnener Weizengrassaft wird oft verdünnt und in kleinen Mengen als Nahrungsergänzungsmittel konsumiert, da er angeblich gesundheitliche Vorteile wie eine Verbesserung von Energie, Verdauung und Immunsystem verspricht.
So gelagert bleibt Weizengras 3-4 Tage lang frisch. Es ist ratsam, es so schnell wie möglich zu verbrauchen, um seinen optimalen Geschmack und seine Nährstoffe zu genießen.
Microgreens Tipps
- Gießen : Gießen Sie die Microgreens aus der unteren Schale, damit die Erde das Wasser aufnehmen kann.
- Überwachung : Mit dem optionalen digitalen LCD-Thermometer-Hygrometer können Sie Temperatur und Luftfeuchtigkeit regelmäßig überwachen. Passen Sie die Bedingungen nach Bedarf an, um optimale Wachstumsbedingungen zu gewährleisten.
- Luftzirkulation: Microgreens haben dichte Samen und benötigen daher Luftzirkulation. Bewahren Sie Ihre Microgreens an einem Ort mit guter Luftzirkulation auf. Sie können sie entweder in der Nähe eines offenen Fensters aufstellen oder einen kleinen rotierenden Ventilator verwenden. Vermeiden Sie es, Ihre Microgreens in geschlossenen Räumen ohne Luftzirkulation aufzubewahren.
- Abfall & Recycling: Wenn Sie Erde, Kokosfasern oder ein anderes biologisch abbaubares Substrat verwenden, legen Sie einfach einen Kompostbehälter an oder suchen Sie nach Recyclinghöfen, beispielsweise in Amsterdam und Amstelveen, wo gebrauchte Erde sortiert und recycelt wird. Hinweis: Für den schnellen Kompostanbau benötigen Sie einen Kompostsack oder -behälter, in den Ihre 1020er-Schale passt. Sobald Sie ein paar Schalen mit Komposterde haben, geben Sie Würmer aus Ihrer Umgebung hinzu oder suchen Sie online nach Tigerwürmern. Innerhalb von 3–4 Monaten haben Sie reichhaltige Komposterde, die Sie in Ihrem Garten verwenden können. Wir empfehlen, Kompost nicht für Microgreens zu verwenden, insbesondere nicht beim Indoor-Anbau.
- Wasserstoffperoxid (Lebensmittelqualität, 3 %) : Ein wirksames natürliches Reinigungsmittel zur Desinfektion und Gewährleistung der Lebensmittelsicherheit. Kann auch sparsam zur Schimmelbekämpfung eingesetzt werden.
- Tipp vom Küchenchef: Die meisten ungeschnittenen oder „lebenden“ Schalen können 1–2 Wochen im begehbaren Kühlschrank aufbewahrt werden. Lagern Sie sie unbedingt im obersten Fach, um die Lebensmittelsicherheitsvorschriften einzuhalten. Sie wachsen im begehbaren Kühlschrank nicht weiter, bleiben aber bis zur Ernte am Leben und frisch.
Der Anbau von Weizengras-Microgreens ist mehr als nur ein Hobby; es ist eine lohnende Möglichkeit, Frische und Nährstoffe in Ihren Alltag zu bringen. Mit nur wenigen Schritten und etwas Geduld können Sie aus einem winzigen Samen eine kraftvolle Quelle für Gesundheit und Vitalität machen.
Schlüsselwörter: Weizengras, Mikrogrün, Sprossen, Mikrogrün , gesund, gezond, Anleitung