Growing Pea Microgreens at Home: An Easy Step-by-Step Guide
Pea microgreens, also known as pea shoots, sprouts or pea tendrils, have a history of culinary use that dates back centuries. Historically, peas have been a staple crop in Dutch agriculture, with their cultivation dating back to medieval times.
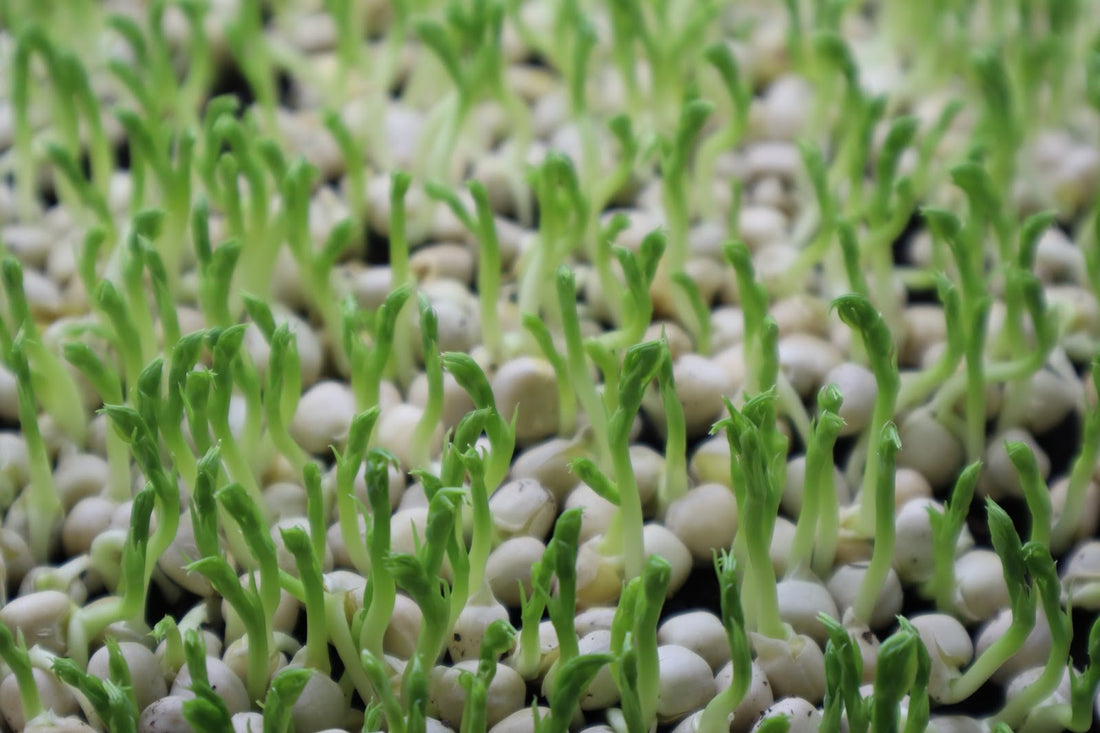
Pea microgreens are the young and tender vines of pea plants, which were likely consumed as a natural extension of pea farming in the beginning. They may have been eaten fresh as a green vegetable or used in salads, soups, and other dishes.
Nevertheless, the history of pea shoot usage in the Netheralands is not well documented as it is intertwined with regional European culinary traditions.
Today, pea shoots are commonly found in Dutch markets and grocery stores, often used in salads, sandwiches, stir-fries, and as garnishes for various dishes. Their popularity has grown due to their delicate flavor, crisp texture, and nutritional benefits, as they are rich in vitamins, minerals, and antioxidants.
In this article, we will explore their health benefits, cultivation methods, offering an in-depth look at this dynamic and innovative ingredient in modern cuisine.
Reasons to Consume Pea Microgreens
High Nutritional Content: Pea microgreens are rich in vitamins, minerals, and antioxidants essential for health, such as vitamin A, C, K, and beta-carotene.
Ease of Growth: Growing Pea microgreens is simple and requires minimal time and expertise. They can be easily cultivated at home with just a few materials and a little attention, providing a continuous source of fresh nutrients.
Culinary Versatility: Pea microgreens can be added to a variety of dishes, such as salads, sandwiches, pasta dishes, and more, adding not only a touch of freshness but also an extra dose of nutrients.
Sustainability: Growing microgreens requires less water and space compared to growing mature vegetables, thus reducing environmental impact and promoting more sustainable farming practices.
Health Benefits of Pea Microgreens
Heart health: Their high levels of antioxidants and fiber may help lower cholesterol levels and reduce the risk of heart disease.
Digestive health: The fiber content in pea microgreens supports digestive health by promoting regularity and preventing constipation.
Immune support: Pea microgreens contain vitamin C, which is essential for a healthy immune system and may help the body fight off infections and illnesses.
Blood sugar regulation: The fiber and protein in pea microgreens can help stabilize blood sugar levels, making them a beneficial addition to the diet for those with diabetes or insulin resistance.
If you're ready to embark on an exciting healthy and tasty journey, keep reading as we unveil the secrets to growing these miniature wonders.
Pea Microgreens Overview
|
Flavor |
Mild, slightly sweet taste |
|
Nutritional Value |
Rich in vitamin A, vitamin C, and vitamin K. They also contain various B vitamins, including folate and vitamin B6. |
|
Pre-soaking |
8-12 hours |
|
Rinsing/Draining |
Yes |
|
Light Requirements |
Prefers indirect sunlight or grow lights |
|
Germination Temperature & Relative Humidity Conditions |
Temperatures: 18°C to 24°C (65°F to 75°F) & RH: 80-90% |
|
Growing Temperature & Relative Humidity |
Thrives in temperatures between 18°C to 24°C (65°F to 75°F) |
|
Watering Needs |
Maintain consistent moisture levels, avoid overwatering |
|
Germination time |
2 to 3 days |
|
Optimal Harvest |
Within 6 to 14 days |
Must-Have Tools for Growing Pea Microgreens
Essential Materials:
- Seeds: High-quality Pea seeds are essential for successful cultivation. Explore our seeds selection here.
- Trays/Containers: You will need two trays—one deep tray with drainage holes to create an optimal growing environment, and another tray without holes to be placed underneath to catch excess water. Check out our selection here.
- Growing medium: Choose a nutrient-rich growing medium such as seed-starting mix or coconut coir to support healthy growth.
- Lighting: Ensure your microgreens receive optimal lighting for robust growth. While natural sunlight is effective, for enhanced results, we recommend our T5 LED Microgreen Grow Lights. Engineered with a 6500K spectrum, these lights are precisely tailored to provide the ideal light spectrum for growing microgreens, guaranteeing optimal growth and health.
- Spray Bottle: A sprayer bottle is necessary for maintaining proper moisture levels during germination and growth.
Optional Materials:
- Humidity Dome: Use a humidity dome to create a moist environment during the germination stage, aiding in successful seed sprouting and early growth. Explore our selection of humidity domes here.
- Rack Cooling Fan: Enhance air circulation and regulate temperature for optimal growth conditions with our rack cooling fan. Additionally, you can control the fan speed using the fan speed controller, allowing for precise adjustment according to your specific needs.
- LCD Digital Thermometer Hygrometer: Monitor indoor temperature and humidity levels using our LCD digital thermometer hygrometer. This tool provides valuable insights into the growing environment, ensuring conditions are optimal for your microgreens' development.
Step-by-Step Growth Process
Now that we have all the necessary materials and information to grow Pea microgreens, here is the step-by-step guide to growing them:
STEP 1: Soak Your Seeds
Place your seeds into a spacious bowl filled with water. Let them soak for a minimum of 6 to 12 hours, but no longer than 24 hours. The seeds will get bigger as they soak. While the seeds soak, they will swell, often doubling in size. You might need to replenish the water during this time, and if necessary, transfer some seeds to another bowl. Once the seeds have absorbed enough water and are plump, drain the bowl and rinse the seeds thoroughly.
STEP 2: Prepare Your 1020 Microgreen Deep Trays
Take the deep tray with holes and place the tray without holes underneath, so that they are stacked together. Begin by filling the upper tray with holes with soil until the surface is level and even - you can use a press or your hand to make the soil even and lightly fill any low areas.

STEP 3: Sow Your Seeds
Evenly spread the pea seeds across the surface. Water the surface using the spray bottle, and add some water to the bottom tray to keep the soil moist throughout.

STEP 4: Germination Stage
Given their natural preference for germinating underground, place another tray over the seeds to maintain darkness. Then add a weight, approximately 5kgs. Remarkably resilient, these seeds can collectively lift weights of up to 5 pounds. Note, that the extra weight helps develop a thicker and stronger stem and root growth.
STEP 5: Growing under T5 Artificial Intelligent Lighting
Once the seeds have germinated (typically within 2-4 days), means that they are now at their next stage of growth: seedling. Remove the humidity dome from the top of the 1020 tray or retrieve your 1020 tray from your designated dark space, and place it under the light source - we recommend using T5 LED 6500K lights, providing sufficient lumens (1200-2200 lumens). Ensure that you also use a timer to program the amount of light your plants need. This will ensure they are able to photosynthesize throughout their lifecycle and deliver the high level of nutrition that your body thrives on.
The distance from your light source is also very important. If your light source is too far from your seedlings, they may become overly stretchy and thin. However, if the light is too close, they may not fully stretch beyond the top of your 1020 tray, making harvesting difficult and reducing yields.
Therefore, we recommend that you place the top of your 1020 tray between 22-25cms from your growing lights.
Of course, if you live in a sunny location, you can certainly place your 1020 tray on the sunny-side of your house, such as on a window-sill or outside.
Temperatures should be similar to those in your germination room, but humidity levels will vary. As your seedlings continue to grow, they will not only require more space but will also continuously release moisture, increasing the relative humidity during the entire growing cycle. To reduce the chances of mold or similar quality issues, maintain your humidity level between 45-55% RH. There are relatively cheap, smart humidifiers available that help you maintain adequate RH. In addition, you can use a fan or ventilator to reduce moisture buildup and high humidity within your 1020 tray.
Watering is also crucial: when you notice that the soil is dry, make sure to water it from the bottom tray to allow the soil to absorb the water. This method is essential to keep the pea microgreens dry, thus preventing fungal issues, which tend to be more prevalent with this type of microgreens.

STEP 6: Harvesting
Once the true leaves and tendrils have developed, the pea microgreens are ready for harvest. Alternatively, you can opt to harvest a portion of the pea microgreens and allow the remaining ones to mature into pea shoots.
https://www.instagram.com/reel/Cwfw-yxqER4/?igsh=OWRzZXI0Z2RlNXhl
STEP 6: EAT YOUR MICROGREENS and Storage
After harvesting your microgreens, you can choose whether to consume them immediately or store them for later. Since we don't use any chemicals and our seeds are organic, they are perfectly safe to eat right after harvesting for maximum freshness and nutrition.
Especially if you're sowing your seeds in soil, we recommend giving your microgreens a quick soak or rinse. Then, pat them dry, and they will be ready for use right after.
If you prefer to consume them at a later time, take a container with a paper towel at the bottom and gently add your freshly cut microgreens. Make sure not to use a very tall container, as microgreens are sensitive to stacking and may spoil quickly if stored this way. Store your pea microgreens in the refrigerator (at 8°C) and consume them within 7-14 days.
Note: the paper towel at the bottom of your container is intended to absorb moisture during refrigeration, which will also increase the shelf life of your microgreens.

Microgreens Tips
- Watering: Water the microgreens from the bottom tray to allow the soil to absorb the water.
- Monitoring: Use the optional LCD digital thermometer hygrometer to monitor temperature and humidity levels regularly. Adjust conditions as needed to maintain optimal growing conditions.
- Air Flow: Microgreens are densely seeded and therefore require airflow. Keep your microgreens in an area with good airflow. You can either keep it close to an open window or add a small rotating fan. Try to avoid keeping your microgreens in an enclosed space without any airflow.
- Waste & Recycling: If you are using soil, coconut coir or another biodegradable growing medium, simply start a compost bin or look for waste recycling centers, such as in the city of Amsterdam and Amstelveen where used soil is sorted and recycled. Note: If you want a quick tip to start your own compost, simply find a compost sack or container that easily fits your 1020 tray for smooth sailing. Once you have a few trays of composted soil, add worms from your surrounding area or find some tiger worms online. Within 3-4 months, you will have rich compost soil that you can use in your outdoor garden. We do not recommend using compost for microgreens, especially when growing indoors
- Hydrogen Peroxide Food Grade 3%: An effective natural cleaning agent used to sanitize and to ensure food safety. Can also be used sparingly when combating mold.
- Chef’s Tip: Most uncut or ‘live’ trays can be stored in a walk-in refrigerator for 1 - 2 weeks. Be sure to store them on the top rack to comply with food safety regulations. They will not continue to grow in the refrigerated walk-in but will stay alive and remain fresh until harvesting.
Incorporating nutrient-rich pea microgreens into your diet not only adds a burst of fresh flavor to your meals but also offers a host of health benefits, making them a delicious and nutritious addition to any culinary repertoire. Happy growing!
Keywords: Pea; Pea microgreens; Pea shoots; sprouts ; Pea sprouts; microgroenten ; healthy ; gezond ; how-to